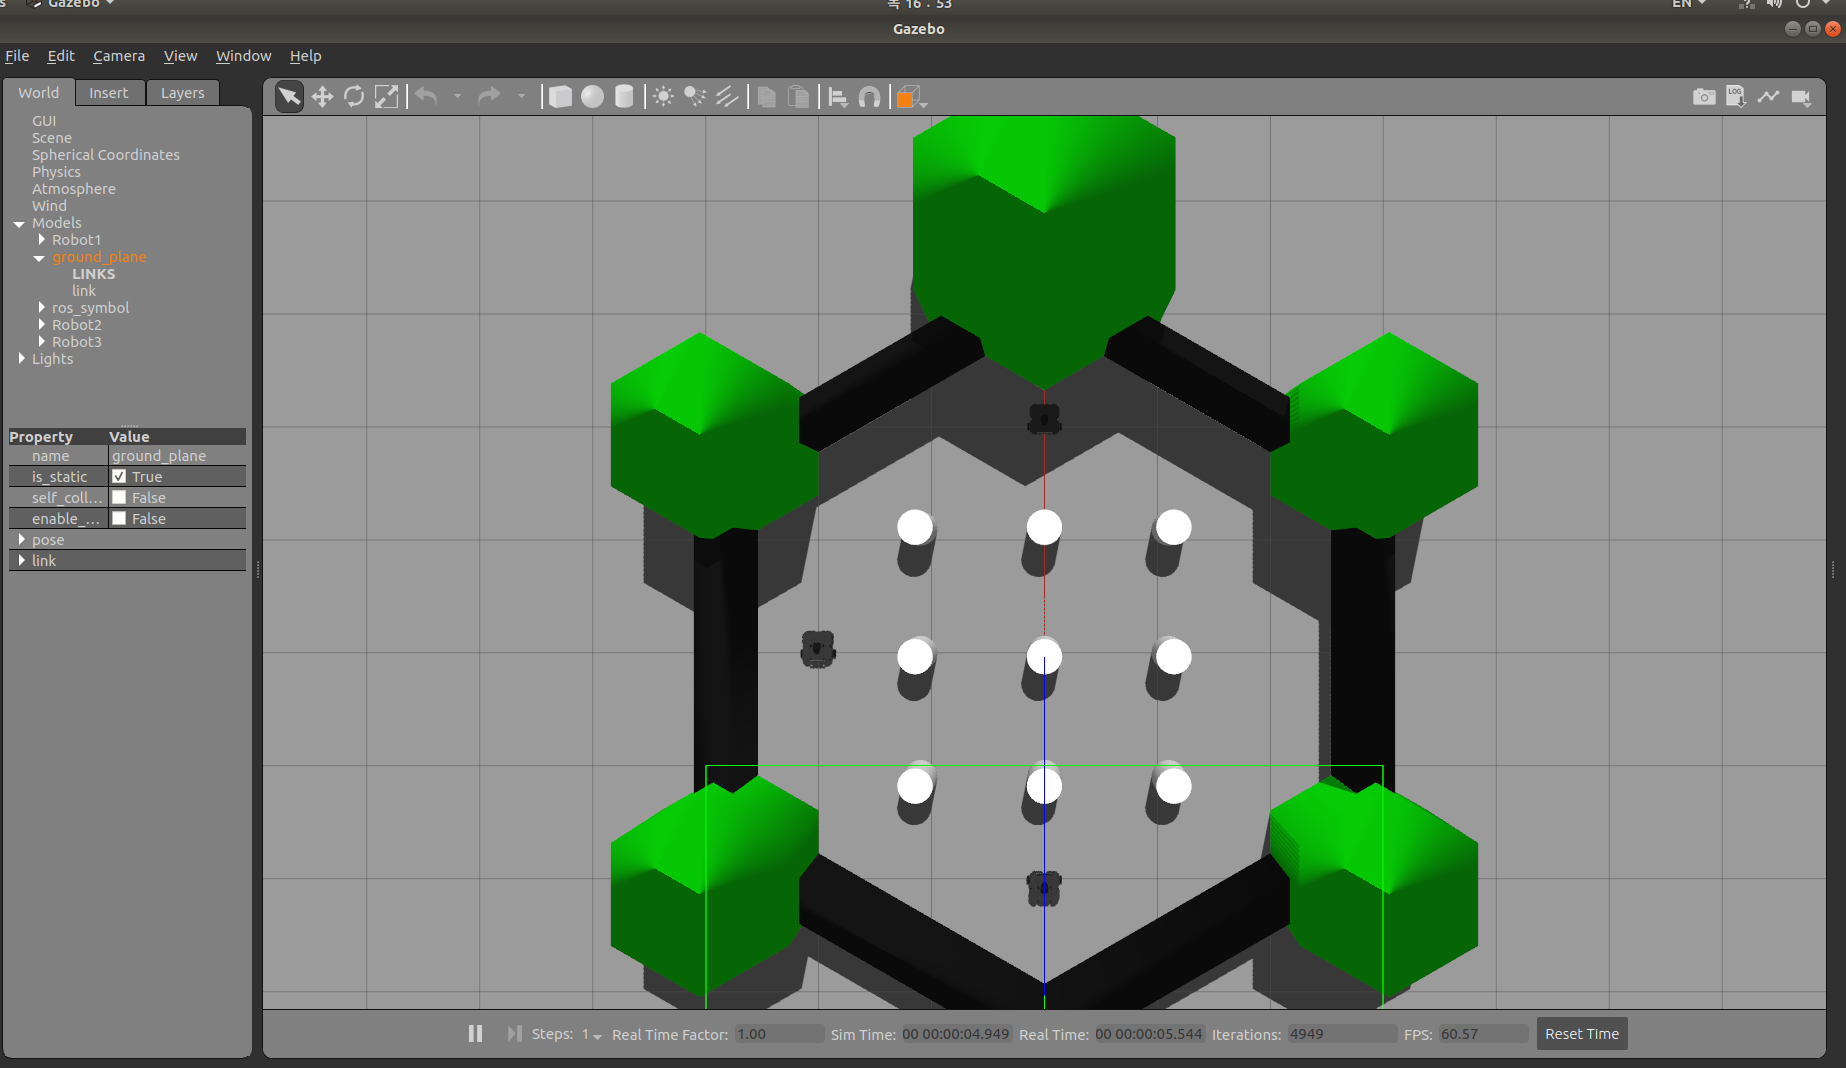
이번 글에서는 Gazebo에서 여러 대 Turtlebot3를 불러오는 방법을 작성하고자 합니다.
I am going to write about how to load multiple Tutlebot3 in Gazebo.
제 개발 환경은 다음과 같습니다.
My Development environment looks like this:
- Ubuntu 18.04
- ROS melodic
0. Turtlebot3 패키지를 설치합니다.
Install the Turtlebot3 package.
$ cd ~/catkin_ws/src
$ git clone https://github.com/ROBOTIS-GIT/turtlebot3.git
$ git clone https://github.com/ROBOTIS-GIT/turtlebot3_simulations.git
$ git clone https://github.com/ROBOTIS-GIT/turtlebot3_msgs.git
$ cd ~/catkin_ws
$ catkin_make
1. 패키지를 하나 만들어줍니다.
Make a package.
$ cd ~/catkin_ws/src
$ catkin_create_pkg multiple_turtlebots_sim
2. 런치파일 작성을 위한 폴더를 생성합니다.
Make a folder for writing launch files.
$ cd ~/catkin_ws/src/multiple_turtlebots_sim
$ mkdir launch
3. 로봇 생성에 대한 런치파일을 작성합니다.
Make a launch file for spawning one robot.
$ cd ~/catkin_ws/src/multiple_turtlebots_sim/launch
$ gedit one_robot.launch
아래 코드 내용을 붙여넣어줍니다.
Paste the code below.
<launch>
    <!-- Set arguments -->
    <arg name="init_pose"/>
    <arg name="robot_name"/>

    <!-- Load robot description -->
    <param name="robot_description" command="$(find xacro)/xacro --inorder $(find turtlebot3_description)/urdf/turtlebot3_waffle.urdf.xacro" />

    <!-- Spwan a robot into Gazebo -->
    <node name="spawn_urdf" pkg="gazebo_ros" type="spawn_model"
          args="$(arg init_pose) -urdf -param robot_description -model $(arg robot_name)"
          respawn="false" output="screen"/>

    <!-- Publich robot state -->
    <node pkg="robot_state_publisher" type="robot_state_publisher"
          name="robot_state_publisher" output="screen"/>
</launch>
간단히 설명드리자면, 하나의 로봇을 스폰하는 모듈 런치파일입니다.
입력으로는 로봇 이름과 초기시작 위치를 받습니다.
In short, it is a module launch file that spawns a single robot.
As input, it receives the robot name and initial starting position.
4. 로봇 여러 대 생성에 대한 런치파일을 작성합니다.
Make a launch file for spawning multiple robots.
$ cd ~/catkin_ws/src/multiple_turtlebots_sim/launch
$ gedit robots.launch
아래 코드 내용을 붙여넣어줍니다.
Paste the code below.
<launch>

    <!-- BEGIN ROBOT 1 -->
    <group ns="robot1">
        <param name="tf_prefix" value="robot1_tf"/>
        <include file="$(find multiple_turtlebots_sim)/launch/one_robot.launch">
            <arg name="init_pose" value="-x 2 -y 0 -z 0 -Y 3.14"/>
            <arg name="robot_name" value="Robot1"/>
        </include>
    </group>

    <!-- BEGIN ROBOT 2 -->
    <group ns="robot2">
        <param name="tf_prefix" value="robot2_tf"/>
        <include file="$(find multiple_turtlebots_sim)/launch/one_robot.launch">
            <arg name="init_pose" value="-x -2 -y 0 -z 0 -Y 0"/>
            <arg name="robot_name" value="Robot2"/>
        </include>
    </group>

    <!-- BEGIN ROBOT 3 -->
    <group ns="robot3">
        <param name="tf_prefix" value="robot3_tf"/>
        <include file="$(find multiple_turtlebots_sim)/launch/one_robot.launch">
            <arg name="init_pose" value="-x 0 -y 2 -z 0 -Y 3.14"/>
            <arg name="robot_name" value="Robot3"/>
        </include>
    </group>

</launch>
여기서, tf_prefix는 one_robot.launch 에서 생성되는 robot_state_publisher 노드의 파라미터 중 하나입니다.
발행되는 로봇 tf에 네임스페이스를 지정해줍니다.
5. 가제보 월드를 불러오는 런치파일 작성합니다.
Make a launch file for loading a gazebo world.
$ cd ~/catkin_ws/src/multiple_turtlebots_sim/launch
$ gedit simulation.launch
아래 코드 내용을 붙여넣어줍니다.
Paste the code below.
<launch>

    <include file="$(find gazebo_ros)/launch/empty_world.launch">
        <arg name="world_name" value="$(find turtlebot3_gazebo)/worlds/turtlebot3_world.world"/>
        <arg name="paused" value="false"/>
        <arg name="use_sim_time" value="true"/>
        <arg name="gui" value="true"/>
        <arg name="headless" value="false"/>
        <arg name="debug" value="false"/>
    </include>

    <include file="$(find multiple_turtlebots_sim)/launch/robots.launch"/>

</launch>
이제 수정된 내용을 갱신합니다.
Now update the modified content.
$ cd ~/catkin_ws && catkin_make
$ rospack profile
6. 결과
$ roslaunch multiple_turtlebots_sim simulation.launch

3대의 터틀봇이 성공적(successfully)으로 스폰된(spawned)것을 확인할 수 있습니다.
다음으로 여러 대 Turtlebot3을 네이게이션으로 움직이는 방법을 작성하겠습니다.
Next, I am going to write about how to use Navigation for multiple Tutlebot3 in Gazebo.
'ROS' 카테고리의 다른 글
| [Ubuntu] Permission denied on Serial Port (0) | 2021.03.31 |
|---|